ZFS root using Debian GNU/kFreeBSD
645 words, 4 minutes
For a while now FreeBSD had ZFS included. Since 8.x, revision 28 is available. The thing is, I don’t really like the FreeBSD package management ; but I love Debian’s one. Here’s the way to provide a stable Kernel with a decent system management on a powerful filesystem.
The installation is done on a virtual machine. The multiple disk configuration has no really use here either than looking at how to do it.
The server configuration
The server is a virtual machine with 2 vCPU, 1GB of RAM, 1 Gbps NIC and 3 virtual disks (3x 8GB). A real production machine would probably have 4GB of RAM, at least 2 NICs and more physical disks.
The Debian kFreeBSD installation
I used “debian-testing-kfreebsd-amd64-DVD-1.iso” to run the installation.
You have to use “amd64” to have build-in ZFS support. And you have to use “testing” to access the latest ZFS revision (with deduplication feature).
Basic configuration
On the boot selector menu, select “Expert install (using kernel of FreeBSD 9)”.
Follow the wizard to “choose language”, “configure the keyboard”, “detect and mount CD-ROM” and “load installer components from CD”. I didn’t load any extra installer components.
Detect and configure the network. Set up users and configure passwords. Configure the clock. Detect disks.
Storage configuration
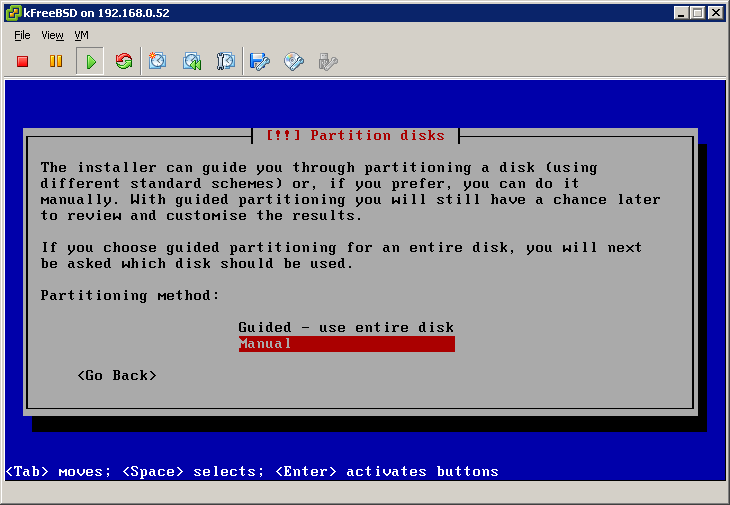
Select the “Partition disks” option.
From the “Partition disks” dialog box, select the “Manual” partition method.
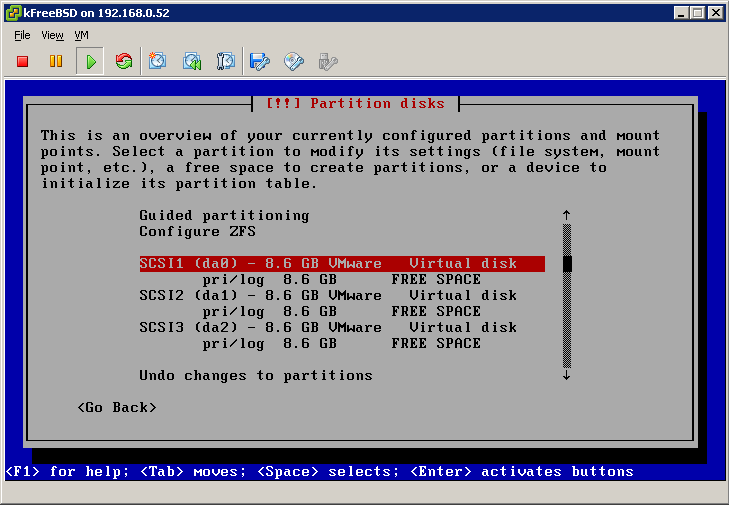
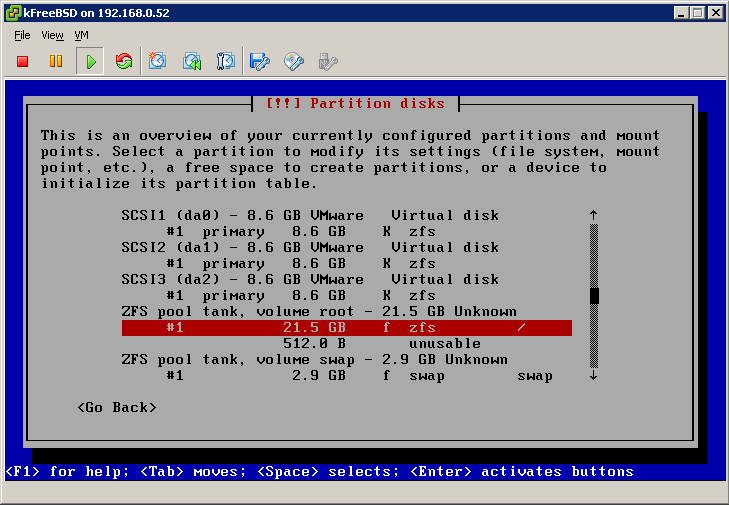
For each disks that you want to use, select it and hit “Enter” to “Create (a) new empty partition table on this device”. I used “msdos” partition table for all disks.
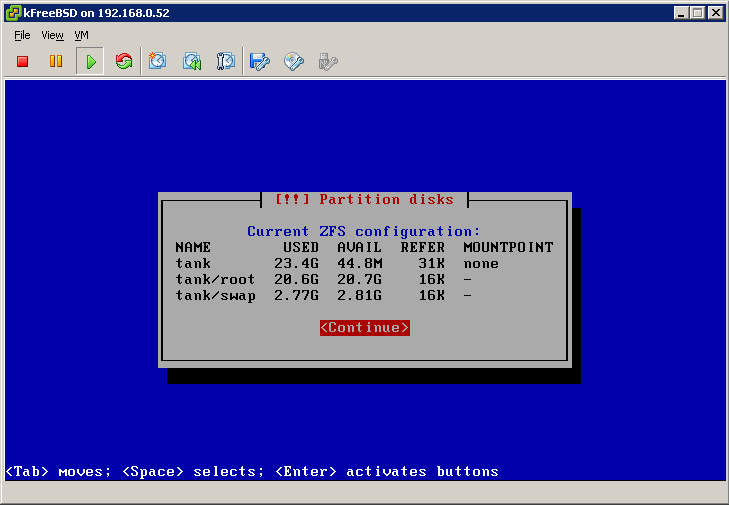
Select the “Configure ZFS” option. And accept to “write the changes to disk and configure ZFS”.
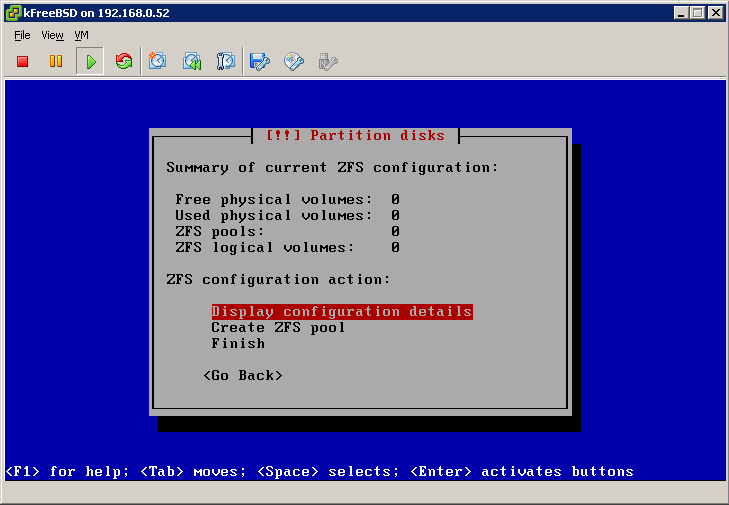
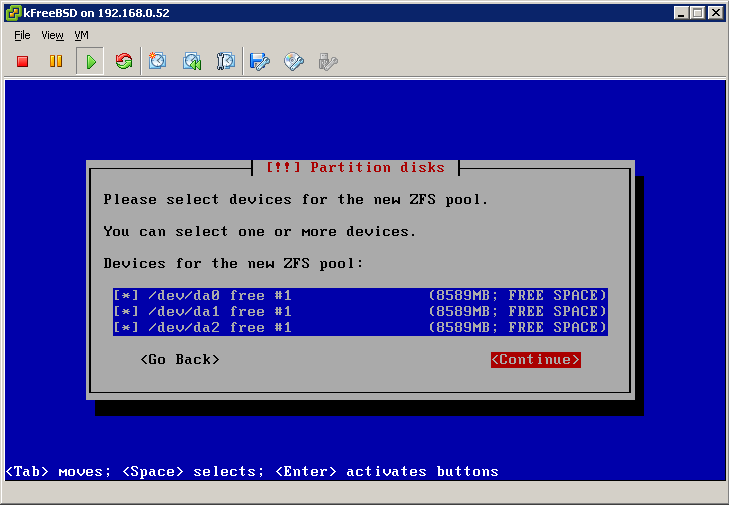
“Create a ZFS pool” by filling-in a pool name, I used “tank”, and selecting “devices for the new pool”. Accept to “write the changes to disk and configure ZFS”. “Create logical volume(s)” on the ZFS pool. I did create a volume for “root” and a volume for “swap” ; they will use the whole pool size. Select the “Finish” option when your ZFS configuration is done.
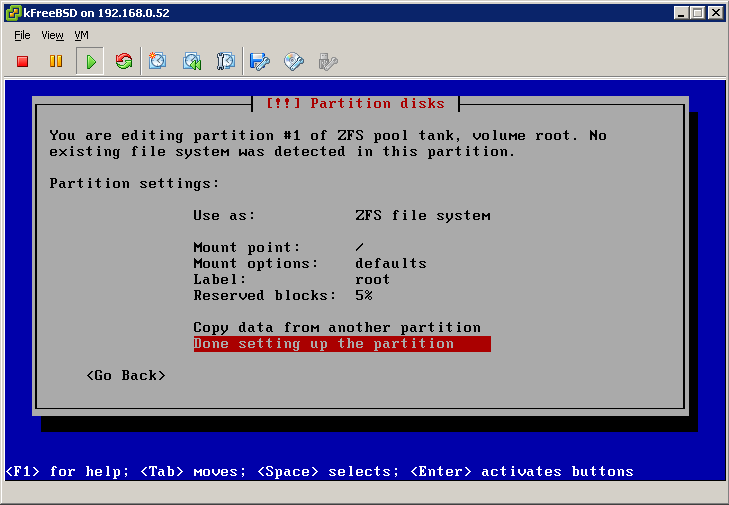
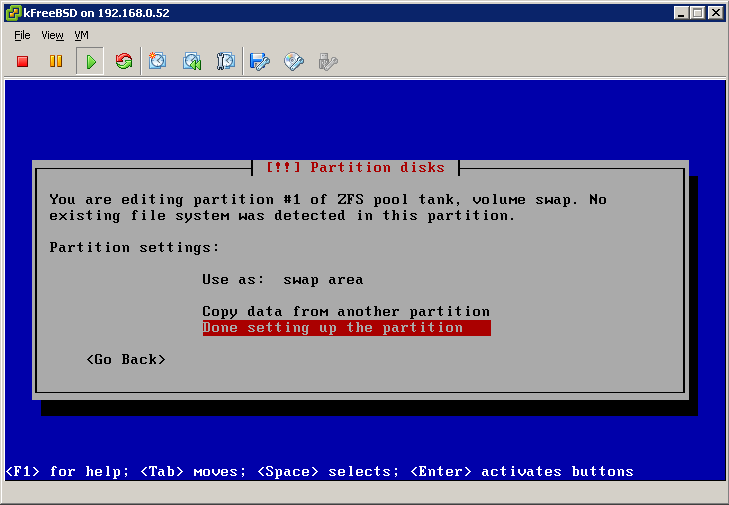
The partitioner will start and will allow you to set the mount points for the ZFS volumes. I did configure the “root” volume as a “ZFS file system” mounted on “/” and the “swap” volume as a “swap area”.
Review the partition layout and select the “Finish partitioning and write changes to disk”.
Final configuration
The end of the installation is done following every steps of the wizard. “Install the base system”, “configure the package manager”, “select and install software”. The kernel I choose to install was “kfreebsd-image-9-amd64”. Note that I couldn’t find a French HTTP mirror hosting kfreebsd ; the German primary does.
At the “Install the GRUB boot loader on a hard disk” step, just select the MBR of the first disk.
The wizard will reboot the computer when the install process is done. And, hopefully, kFreeBSD will boot on it’s ZFS pool.
Things not so nice
Although this installation is quite nice, there are still a few things I don’t like.
The ZFS pool is configured as a “slice” (RAID0). There is no (easy) way to configure a RAIDZ pool. The only way to do so is to drop to a console and create the ZFS pool with `zpool create` rather than with the wizard. But since I tried that, the wizard would die while, I guess, mounting root. In a real production environment, it would be really nice to be able to install the system on, at least, a RAID1 pool.
Another thing is the GRUB installation. It is installed only on the first disk. This means that if this particular disk crashes, the whole system won’t boot. I guess a workaround would be to manually install grub on every disks ; or a least two.
BTW, it would be nice to have kFreeBSD driving my Synology DS409slim (ARM cpu) with ZFS…