OpenBSD 6.7 on PC Engines APU4D4
900 words, 5 minutes
I just got myself a PC Engines APU4D4. I miss an OpenBSD box providing home services. It’s quite simple to install and run OpenBSD on this machine. And you can even update the BIOS from OpenBSD.
The hardware
This is what I purchased:
- apu4d4	APU.4D4 system board 4GB
- msata120b	SSD M-Sata 120GB TLC Kingfast
- apupad	Blue heat conductive pad
- apufix1a0	Heat spreader placement template
- case1d4blku	Enclosure 4 LAN, black, USB
- ac12veur3	AC adapter 12V 2A euro for IT equipment
- usbcom1a	Adapter USB to DB9F with USB cable
The motherboard specs are available on the apu4d4 web page. The mounting instructions were a bit confusing as apu cooling assembly instructions does not demonstrate APU4; which has a single chip to cool down. The heat spreader placement fixture is quite helpful to place the alu heat spreader properly.
The APU4 manual has a heat spreader assembly section that details the mountihg process.
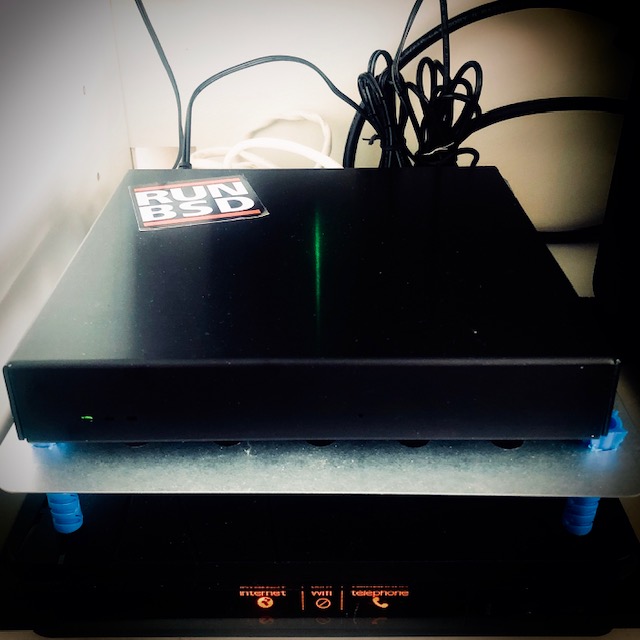
Once the system is assembled, plug the console, Ethernet and power cables. And if you fancy it, advertise by decorating the enclosure ;-)
Every following steps were done using a ThinkPad X260 running OpenBSD. YMMV depending on the OS you’re using. Installation is done from an external USB key.
Download the OpenBSD 6.7 install media and copy it to an USB key.
# ftp https://cdn.openbsd.org/pub/OpenBSD/6.7/amd64/install67.fs
(...)
# doas dd if=install67.fs of=/dev/rsd3c bs=1m
454+1 records in
454+1 records out
476545024 bytes transferred in 24.990 secs (19069240 bytes/sec)
Unplug the USB thumb from the laptop and stick it into an APU4 USB port.
Connect the console cable to the laptop. Identify the console device and tell cu to use it.
# dmesg | tail
uslcom0 at uhub0 port 2 configuration 1 interface 0 \
  "Silicon Labs CP2104 USB to UART Bridge Controller" rev 2.00/1.00 addr 4
ucom0 at uslcom0 portno 0

# doas cu -l cuaU0 -s 115200 | tee cu.log
Note that you don’t have to use tee. I use it to simply capture all the things that will happen during installation.
Power on the APU and hit F10 in the cu session. Select the USB drive to boot on. Tell the bootloader to use console. Then let it do its job.
PC Engines apu4
coreboot build 20193012
BIOS version v4.11.0.2
4080 MB ECC DRAM

SeaBIOS (version rel-1.12.1.3-0-g300e8b7)


Select boot device:


2. AHCI/0: KingFast ATA-9 Hard-Disk (111 GiBytes)
3. Payload [setup]
4. Payload [memtest]

Booting from Hard Disk...
Using drive 0, partition 3.
Loading......
probing: pc0 com0 com1 com2 com3 mem[639K 3581M 496M a20=on]
disk: hd0+ hd1+*
>> OpenBSD/amd64 BOOT 3.47
boot>
boot>
switching console to com>> OpenBSD/amd64 BOOT 3.47
boot>
cannot open hd0a:/etc/random.seed: No such file or directory
booting hd0a:/6.7/amd64/bsd.rd: 3826379+1557504+3881976+0+598016 [301104+128+465696+311208]=0xa71778
entry point at 0xffffffff81001000
Copyright (c) 1982, 1986, 1989, 1991, 1993
      The Regents of the University of California.  All rights reserved.
Copyright (c) 1995-2020 OpenBSD. All rights reserved.  https://www.OpenBSD.org

OpenBSD 6.7 (RAMDISK_CD) #177: Thu May  7 11:19:02 MDT 2020
(...)
There is nothing special happening during the installation ; so I won’t detail it.
You obviously want to configure the default console during the installation process.
Available speeds are: 9600 19200 38400 57600 115200.
Which speed should com0 use? (or 'done') []
The only surprising thing I noted is that when I went for a “whole disk (G)PT” disk configuration, the installer told me that “An EFI/GPT disk may not boot. Proceed?”. So I answered “no” and went for a “(W)hole disk MBR” configuration. And all went ok.
When the installer is finished, halt the system, remove the USB stick and boot the APU. I kept the console connected to keep an eye on the process. But everything went ok without any user interaction.
Access is now granted using SSH or console.
Update BIOS using OpenBSD
The official PC Engines HOWTO page recommends “using TinyCore which comes with the tool flashrom”. I had a look at it but abandoned soon when I realized flashrom was available in OpenBSD ports.
From the console or using SSH, grant access to a shell on the APU and install the flashrom utility.
# pkg_add flashrom
(...)
flashrom-1.1p3: ok
New and changed readme(s):
        /usr/local/share/doc/pkg-readmes/flashrom
Check and download the last stable firmware.
# ftp https://3mdeb.com/open-source-firmware/pcengines/apu4/apu4_v4.11.0.6.rom
Read the flashrom readme file and process to BIOS upgrade. I rebooted in *single user mode* and issued all commands from the console connection.
> OpenBSD/amd64 BOOT 3.47
switching console to com>> OpenBSD/amd64 BOOT 3.47
boot>
booting hd0a:/bsd: 12948808+2757640+331808+0+708608 [806926+128+1024872+749630]=0x1271838
(...)
Enter pathname of shell or RETURN for sh: /bin/ksh
#
#
#
flashrom v1.1 on OpenBSD 6.7 (amd64)
(...)
Vendor ID: PC Engines, part ID: apu4
Using Internal DMI decoder.
DMI string chassis-type: "Desktop"
DMI string system-manufacturer: "PC Engines"
DMI string system-product-name: "apu4"
DMI string system-version: "1.0"
DMI string baseboard-manufacturer: "PC Engines"
DMI string baseboard-product-name: "apu4"
DMI string baseboard-version: "1.0"
Found chipset "AMD FCH" with PCI ID 1022:780e.
Enabling flash write... SPI base address is at 0xfec10000
(...)
Erase/write done.
Verifying flash... VERIFIED.
Restoring MMIO space at 0xcef0674a022
Restoring MMIO space at 0xcef0674a000

#
single user: not running shutdown scripts
syncing disks... done
rebooting...
PC Engines apu4
coreboot build 20202604
BIOS version v4.11.0.6
(...)
The BIOS version has been applied.
Issue an “~.” to quit cu. Now is time to do real things with it.
In case you’re interested, full dmesg is available here . apmd(8) works in adjustment mode. Temperature while idling @600 MHz seem to be 55°C.
#EOF :)